Welcome to my tutorial on learning the Ionic Framework. During the course of this lab, you’ll hopefully learn a basic understanding of the Ionic Framework and also learn a bit if Angular 5. If you’re already familiar with either one, this lab will probably not be for you.
Lab four will walk through forms in a mobile application.
It took me a while to fully grasp these concepts to I hope to share with you want I learned. If you missed Lab Three check out Learning the Ionic Framework – Events.
Getting Started
First things first. I already created the lab four page and set it up so that navigation will work. I think after using ionic generate page 3 times (if you followed my other labs) you have the idea right?
- Create a lab-four-start folder on your machine and open it with VS Code
- git clone – https://github.com/bwhittington/ionic-lab-four-start
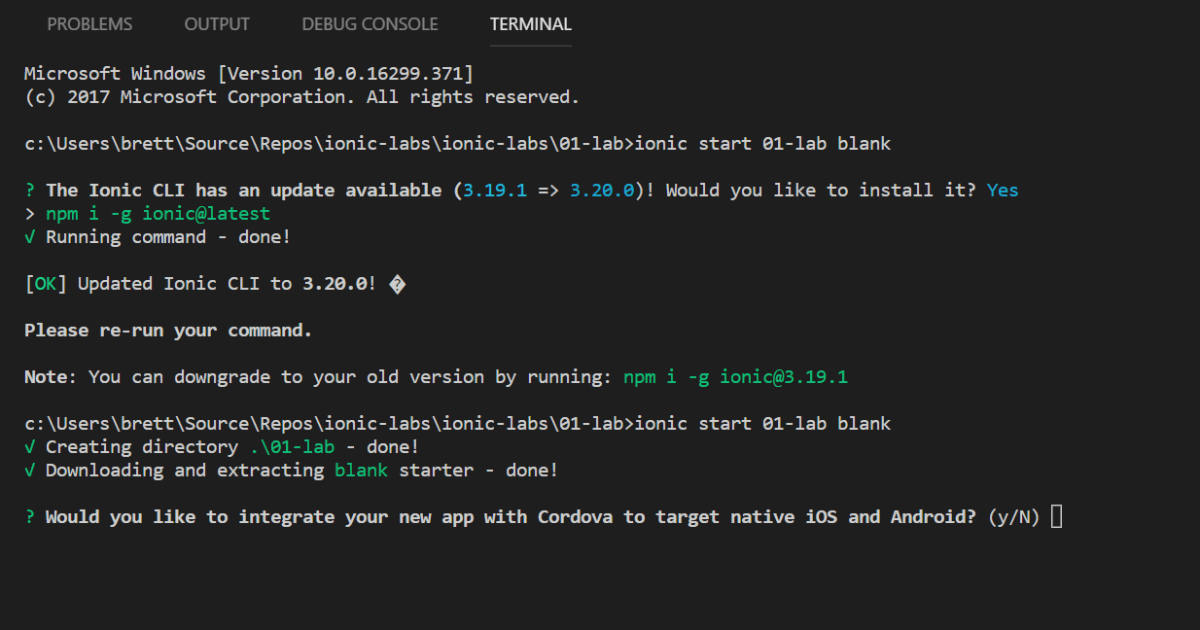
- ionic serve
- Click on Lab Four.
- You should see a blank page!
Forms!
We’ll be building a basic form in Ionic. We’ll be heavily using a lot of features of Angular to accomplish this task but there are really two different ways to build these forms.
Template Driven Forms
Template driven forms are more what developers are used to. To build them you would create HTML controls just like you would in a normal web page and you bind them using directives like NgModel. Another feature of these types of forms is that they are asynchronous which means you can immediately update any one value through all the children of the form. A negative is that due to this updating, you have to wait a tick before you can changing any thing else on the component. Another negative is that it is hard to test these types of forms.
Reactive Forms
Reactive form are quite a bit different from what most developers are used to. One difference is the handling of the data is explicit between the data model and the UI. This offers easier testing of the data if you are so inclined. The component can also push data and pull changes out. The benefit is that the data model is immutable so there are no timing issues that can arise like template driven forms.
Let’s Do This!
We’ll be working with Reactive Forms in this lab because I want to and I think it is good to go over something that most people haven’t done.
So far our solution has a books component and all of it’s stuff is in one folder. If we follow the Angular style guide, we should really be breaking things into separate folders. In past labs, we didn’t need to do this because we only had one component. In this lab, we will be creating two new additional components, so we should do some refactoring.
- Create a book-list folder.
- Create a book-details folder.
- Create a add-book folder.
- Create shared folder
- Rename books.html to book-list.html and move it to book-list
- Rename books.scss to book-list.scss and move it to book-list.
- Rename books.ts to book-list.ts and move it to book-list
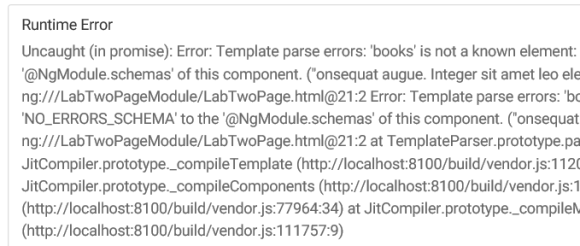
Run ionic-serve and expect some errors.

Let’s do a full search for the following and fix up our imports!
- book-list.ts – import { Book } from ‘../shared/book.model’
- details.ts – import { Book, fakeBookList } from ‘../../components/books/shared/book.model’;
- lab-three.ts –import { Book, fakeBookList } from ‘../../components/books/shared/book.model’;
- lab-two.ts – import { Book, fakeBookList } from ‘../../components/books/shared/book.model’;
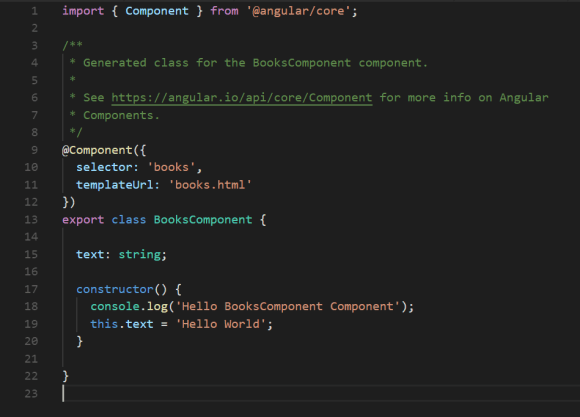
We also need to fix our book-list.ts reference to the template file.
@Component({
 selector: 'books',
 templateUrl: 'book-list.html'
 })
Now that books is it’s own section, we should create a books module that will wrap all of our books components in one namespace. This will prevent us from having to constantly add all of our components to all the pages we need.
import { NgModule } from '@angular/core';
import { IonicModule } from 'ionic-angular';
import { BooksComponent } from '../books/book-list/book-list';

@NgModule({
    declarations: [BooksComponent],
    imports: [IonicModule],
    exports: [BooksComponent]
})
export class BooksModule {}
Now click through your app in ionic serve every page should be working with the changes we just made!
We also should clean up our details page from lab three. We have functionality there that should really be a component. To accomplish this, we will create this component under book-details. We could use ionic generate to do this, but it would just create a new folder under the components root. In situations like these, I don’t like breaking away from the Angular style guide. So create the following files in book-details:
- book-details.html
- book-details.scss
- book-details.ts
Copy the book-details html code from details.html and paste into book-details. This means everything inside the ion-content tags. Then replace that code with tags for book-details. We also want to send in pass in our book data.
<!--
  Generated template for the DetailsPage page.

  See http://ionicframework.com/docs/components/#navigation for more info on
  Ionic pages and navigation.
-->
<ion-header>

  <ion-navbar>
    <ion-title>Book Details</ion-title>
  </ion-navbar>

</ion-header>


<ion-content padding>
  <book-details [book]='book'></book-details>
</ion-content>
Paste the details code into book-details.html
<ion-card>
  <ion-card-header>
      <h2 class="card-title">{{ book.title }}</h2>
  </ion-card-header>
    <div class="card__image"></div>
    <p class="card-subtitle">{{ book.description }}</p>
  </ion-card>
Add the component code in book-details.ts this should look super similar to details.ts.
import { Component, Input } from '@angular/core';
import { IonicPage, NavController, NavParams } from 'ionic-angular';
import { Book, fakeBookList } from '../shared/book.model';

@Component({
  selector: 'book-details',
  templateUrl: 'book-details.html',
})
export class BookDetailsComponent {
  @Input() book: Book;

  constructor() {
  }


  ionViewDidLoad() {
    console.log('ionViewDidLoad DetailsPage');
  }

}
Finally, copy the css from details.scss and paste it into book-details.scss.
<br />  .card__image {
    height:30vmin;
    background: url('/assets/imgs/code.jpg') center no-repeat;
    background-size:cover;
  }
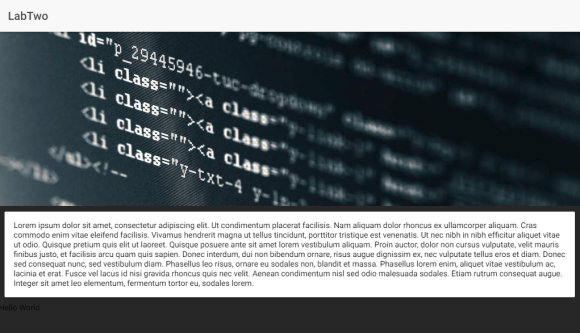
Now, every thing that was working from Lab Three is working again despite us changing component names and creating a new component.
Off to the Forms!
In the add-book folder, add the following new files:
- add-book.html
- add-book.scss
- add-book.ts
In your add-book.html use the following code to setup your template.
<br /><h2>Add Book</h2>
<p>Please add the following information to add a new book to the list.</p>
<ion-list>
    <ion-item>
        <ion-label floating>Book Name</ion-label>
        <ion-input class="form-control" [formControl]="title"></ion-input>
    </ion-item>
    <ion-item>
        <ion-label floating>Book Description</ion-label>
        <ion-input class="form-control" [formControl]="description"></ion-input>
    </ion-item>
    <ion-item>
      <ion-label floating>Cover Image</ion-label>
      <ion-input class="form-control" [formControl]="backgroundImage"></ion-input>
    </ion-item>
</ion-list>
In your add-book.ts use the following code to link your reactive form with your template.
import { Component, Input } from '@angular/core';
import { IonicPage, NavController, NavParams } from 'ionic-angular';
import { Book, fakeBookList } from '../shared/book.model';
import { FormControl, FormGroup } from '@angular/forms';

@Component({
  selector: 'add-book',
  templateUrl: 'add-book.html'
})
export class AddBookComponent {
  title = new FormControl();
  description = new FormControl();
  backgroundImage = new FormControl();

  constructor() {

  }

  ionViewDidLoad() {
    console.log('ionViewDidLoad DetailsPage');
  }

}
import { Component, Input } from '@angular/core';
import { IonicPage, NavController, NavParams } from 'ionic-angular';
import { Book, fakeBookList } from '../shared/book.model';
import { FormControl, FormGroup } from '@angular/forms';

@Component({
  selector: 'add-book',
  templateUrl: 'add-book.html'
})
export class AddBookComponent {
  addBookForm = new FormGroup ({
  title : new FormControl(),
  description : new FormControl(),
  backgroundImage : new FormControl(),
  });

  constructor() {

  }

  ionViewDidLoad() {
    console.log('ionViewDidLoad DetailsPage');
  }

}
So now we have a reactive form. However, the way it is setup now is not the greatest. The above is great for single input forms but falls flat when you have multiple values. For instance, these are all separate form fields. We should link them together so that with a parent. To do that we need to wrap them in a form group. To do this we need to a form tag to the HTML and update the form control attributes to form control names. This look like the below
<br /><h2>Add Book</h2>
<p>Please add the following information to add a new book to the list.</p>
<form [formGroup]="addBookForm">
<ion-list>
    <ion-item>
        <ion-label floating>Book Name</ion-label>
        <ion-input class="form-control" formControlName="title"></ion-input>
    </ion-item>
    <ion-item>
        <ion-label floating>Book Description</ion-label>
        <ion-input class="form-control" formControlName="description"></ion-input>
    </ion-item>
    <ion-item>
      <ion-label floating>Cover Image</ion-label>
      <ion-input class="form-control" formControlName="backgroundImage"></ion-input>
    </ion-item>
</ion-list>
</form>
import { Component, Input } from '@angular/core';
import { IonicPage, NavController, NavParams } from 'ionic-angular';
import { Book, fakeBookList } from '../shared/book.model';
import { FormControl, FormGroup } from '@angular/forms';

@Component({
  selector: 'add-book',
  templateUrl: 'add-book.html'
})
export class AddBookComponent {
  addBookForm = new FormGroup ({
    title : new FormControl(),
    description : new FormControl(),
    backgroundImage : new FormControl(),
  });

  constructor() {

  }

  ionViewDidLoad() {
    console.log('ionViewDidLoad DetailsPage');
  }

}
All of the above code will work but as your forms get more complicated all of this setup starts to become monstrous. This is where the Form Builder comes in and is honestly what I like to use regardless of what my form is like. We won’t need to update our template this time but our class is now a bit different.
import { Component, Input } from '@angular/core';
import { IonicPage, NavController, NavParams } from 'ionic-angular';
import { Book, fakeBookList } from '../shared/book.model';
import { FormBuilder, FormGroup } from '@angular/forms';

@Component({
  selector: 'add-book',
  templateUrl: 'add-book.html'
})
export class AddBookComponent {
  addBookForm: FormGroup

  constructor(private builder: FormBuilder) {
    this.createForm();
  }

  createForm(){
    this.addBookForm = this.builder.group({
      title: '',
      description: '',
      backgroundImage: ''
    })
  }

  ionViewDidLoad() {
    console.log('ionViewDidLoad DetailsPage');
  }

}
Validators
Our form isn’t too useful right now, mostly because it doesn’t do anything now but it also doesn’t validate any of the inputs. Adding these validators is super easy though. Just import the Validators module and update the form group to add the validators. So we can test that form is working, let’s add a submit button.
import { Component, Input } from '@angular/core';
import { IonicPage, NavController, NavParams } from 'ionic-angular';
import { Book, fakeBookList } from '../shared/book.model';
import { FormBuilder, FormGroup, Validators } from '@angular/forms';

@Component({
  selector: 'add-book',
  templateUrl: 'add-book.html'
})
export class AddBookComponent {
  addBookForm: FormGroup

  constructor(private builder: FormBuilder) {
    this.createForm();
  }

  createForm(){
    this.addBookForm = this.builder.group({
      title: ['', Validators.required ],
      description: ['', Validators.required ],
      backgroundImage: ['', Validators.required ]
    })
  }

  ionViewDidLoad() {
    console.log('ionViewDidLoad DetailsPage');
  }

}
And the HTML
<br /><h2>Add Book</h2>
<p>Please add the following information to add a new book to the list.</p>
<form [formGroup]="addBookForm">
<ion-list>
    <ion-item>
        <ion-label floating>Book Name</ion-label>
        <ion-input class="form-control" formControlName="title" required></ion-input>
    </ion-item>
    <ion-item>
        <ion-label floating>Book Description</ion-label>
        <ion-input class="form-control" formControlName="description" required></ion-input>
    </ion-item>
    <ion-item>
      <ion-label floating>Cover Image</ion-label>
      <ion-input class="form-control" formControlName="backgroundImage" required></ion-input>
    </ion-item>
    <ion-item>
        <button ion-button type="submit" [disabled]="!addBookForm.valid">Submit</button>
    </ion-item>
</ion-list>
</form>
import { Component, Input } from '@angular/core';
import { IonicPage, NavController, NavParams } from 'ionic-angular';
import { Book, fakeBookList } from '../shared/book.model';
import { FormBuilder, FormGroup, Validators } from '@angular/forms';

@Component({
  selector: 'add-book',
  templateUrl: 'add-book.html'
})
export class AddBookComponent {
  addBookForm: FormGroup

  constructor(private builder: FormBuilder) {
    this.createForm();
  }

  createForm(){
    this.addBookForm = this.builder.group({
      'title': ['', Validators.required ],
      'description': ['', Validators.required ],
      'backgroundImage': ['', Validators.required ]
    })
  }

  ionViewDidLoad() {
    console.log('ionViewDidLoad DetailsPage');
  }

}
Lastly, let’s “save” our new book by filling everything out! Update the add-book.ts file with a save book method and have it print out a message when the save is valid. Update the html to add a submit method
<h2>Add Book</h2>
<p>Please add the following information to add a new book to the list.</p>
<form [formGroup]="addBookForm" (submit)="saveUser()">
<ion-list>
    <ion-item>
        <ion-label floating>Book Name</ion-label>
        <ion-input class="form-control" formControlName="title" required></ion-input>
    </ion-item>
    <ion-item>
        <ion-label floating>Book Description</ion-label>
        <ion-input class="form-control" formControlName="description" required></ion-input>
    </ion-item>
    <ion-item>
      <ion-label floating>Cover Image</ion-label>
      <ion-input class="form-control" formControlName="backgroundImage" required></ion-input>
    </ion-item>
    <ion-item>
        <button ion-button type="submit" [disabled]="!addBookForm.valid">Submit</button>
    </ion-item>
</ion-list>
</form>
Finally check that the form is dirty and is valid and print out that the save happened.
import { Component, Input } from '@angular/core';
import { IonicPage, NavController, NavParams } from 'ionic-angular';
import { Book, fakeBookList } from '../shared/book.model';
import { FormBuilder, FormGroup, Validators } from '@angular/forms';

@Component({
  selector: 'add-book',
  templateUrl: 'add-book.html'
})
export class AddBookComponent {
  addBookForm: FormGroup

  constructor(private builder: FormBuilder) {
    this.createForm();
  }

  createForm(){
    this.addBookForm = this.builder.group({
      'title': ['', Validators.required ],
      'description': ['', Validators.required ],
      'backgroundImage': ['', Validators.required ]
    })
  }

  saveUser() {
    if (this.addBookForm.dirty && this.addBookForm.valid) {
      alert(`Title: ${this.addBookForm.value.title} Description: ${this.addBookForm.value.description}`);
    }
  }

  ionViewDidLoad() {
    console.log('ionViewDidLoad DetailsPage');
  }

}
The Results!
![]()
Next Time
That’s it! That is how you work with Forms in Ionic. Obviously there are more to them but this will get you started creating your first Ionic App. My next tutorial will be going over saving data and actually using some Cordova plugins. We’ll actually hook up our add book form to a “database” and start adding new books to our list. Hope to see you then!