
Welcome to my tutorial on learning the Ionic Framework. During the course of this lab, you’ll hopefully learn a basic understanding of the Ionic Framework and also learn a bit if Angular 5. If you’re already familiar with either one, this lab will probably not be for you.
Lab Five will walk through Ionic Cordova Plugins in a mobile application.
It took me a while to fully grasp these concepts to I hope to share with you want I learned. If you missed Lab four check out Learning the Ionic Framework – Forms.
Getting Started
First things first. I already created the lab five page and set it up so that navigation will work. I also recreated Lab Four so that we’ll be ready to use the plugins in Lab 5.
- Create a lab-four-start folder on your machine and open it with VS Code
- git clone – https://github.com/bwhittington/ionic-lab-five-start
- ionic serve
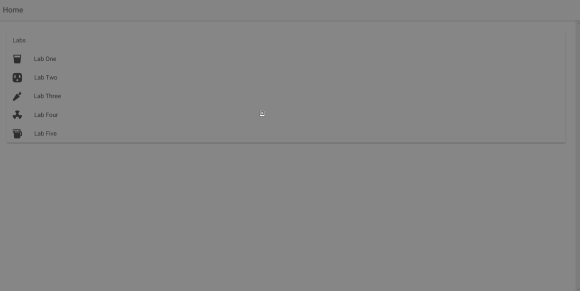
- Click on Lab Five.
- You should see a reactive form we built in Lab 4!
Plugins
Plugins are really the meat and potatoes of most hybrid mobile applications. They allow developers to use features and functionality of native devices without actually having write native code. The Ionic Framework does this by making use of Cordova. In this lab we’ll be using the Ionic Storage plugin. Because these labs are not being run on a mobile device at the moment and we are running them in the browser, you might notice that some plugins do not work.
Cordova plugins expect to be run on a mobile device and won’t work in a browser unless the plugin’s maker creates a proxy. A few default plugins included in the project do have a proxy, let’s see what happens for those.
Run ionic cordova run browser. This kicks off ionic to run using plugins even if in a browser. The first plugin you’ll notice is the splash screen as seen below.
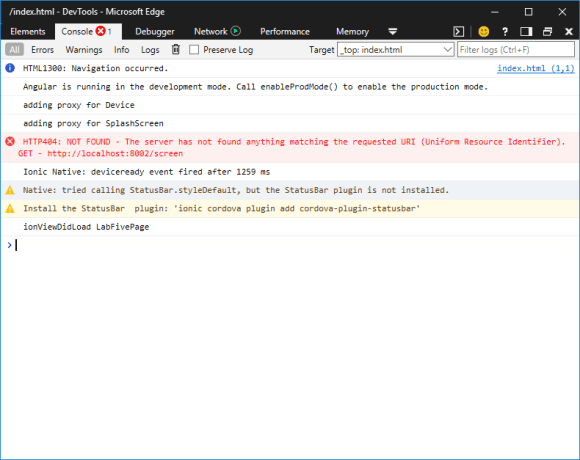
The splash screen works because it has a proxy. The Status Bar plugin also gets installed by default but does not have a proxy so it doesn’t work. You can see evidence of this by looking at the browser console.
Ionic Storage Plugin
We are going to be using the storage plugin. What’s great about it is that it tries to use SQLite to handle database and if it can’t do that it falls back to IndexDB and the Web SQL. SQLite is a powerful relational database but using Ionic Storage, we’re really just using it as a document database and storing things as key/value pairs. To get started we need to accomplish the following tasks:
- ionic cordova plugin add cordova-sqlite-storage
- Add the module to our app module.ts
import { BrowserModule } from '@angular/platform-browser';
import { ErrorHandler, NgModule } from '@angular/core';
import { IonicApp, IonicErrorHandler, IonicModule } from 'ionic-angular';
import { SplashScreen } from '@ionic-native/splash-screen';
import { StatusBar } from '@ionic-native/status-bar';
import { IonicStorageModule } from '@ionic/storage';

import { MyApp } from './app.component';
import { HomePage } from '../pages/home/home';
import { DetailsPageModule } from '../pages/details/details.module';
import { ReactiveFormsModule } from '@angular/forms';

@NgModule({
  declarations: [
    MyApp,
    HomePage,
  ],
  imports: [
    BrowserModule,
    IonicModule.forRoot(MyApp),
    DetailsPageModule,
    ReactiveFormsModule,
    IonicStorageModule.forRoot()
  ],
  bootstrap: [IonicApp],
  entryComponents: [
    MyApp,
    HomePage
  ],
  providers: [
    StatusBar,
    SplashScreen,
    {provide: ErrorHandler, useClass: IonicErrorHandler}
  ]
})
export class AppModule {}
So everything is setup and ready to go to start using the Ionic Storage plugin. So let’s start saving our new books! First we need to import the ionic storage component and then inject it into our constructor. This will let us use it in our component. Next we need to update our saveUser method to actually save the form stuff in the “database”.
import { Component, Input } from '@angular/core';
import { IonicPage, NavController, NavParams } from 'ionic-angular';
import { Book, fakeBookList } from '../shared/book.model';
import { FormBuilder, FormGroup, Validators } from '@angular/forms';
import { Storage } from '@ionic/storage';

@Component({
  selector: 'add-book',
  templateUrl: 'add-book.html'
})
export class AddBookComponent {
  addBookForm: FormGroup

  constructor(private builder: FormBuilder, private storage: Storage) {
    this.createForm();
  }

  createForm(){
    this.addBookForm = this.builder.group({
      'title': ['', Validators.required ],
      'description': ['', Validators.required ],
      'backgroundImage': ['', Validators.required ]
    })
  }

  saveUser() {
    if (this.addBookForm.dirty && this.addBookForm.valid) {
      const book = {
        title: this.addBookForm.value.title,
        description: this.addBookForm.value.description,
        backgroundImage: this.addBookForm.value.backgroundImage
      }
      this.storage.set(book.title, book);
      alert(`Title: ${this.addBookForm.value.title} Description: ${this.addBookForm.value.description}`);
    }
  }

  ionViewDidLoad() {
    console.log('ionViewDidLoad DetailsPage');
  }

}
Next we need to update the Lab-Three.ts (I know, we're reusing old labs) but in the ionViewDidLoad() method we need also add logic to get our new book out.
import { Component } from '@angular/core';
import { IonicPage, NavController, NavParams } from 'ionic-angular';
import { Book, fakeBookList } from '../../components/books/shared/book.model';
import { DetailsPage } from '../details/details';
import { Storage } from '@ionic/storage';

/**
 * Generated class for the LabThreePage page.
 *
 * See https://ionicframework.com/docs/components/#navigation for more info on
 * Ionic pages and navigation.
 */

@IonicPage(
  {
    name: 'lab-three'
  }
)
@Component({
  selector: 'page-lab-three',
  templateUrl: 'lab-three.html',
})
export class LabThreePage {
  bookList:Array =  fakeBookList;

  constructor(public navCtrl: NavController, public navParams: NavParams, private storage: Storage) {

  }

  ionViewDidLoad() {
    console.log('ionViewDidLoad LabThreePage');
    this.storage.get('test').then((val) => {
      let book : Book = {
        id : 10,
        title : val.title,
        description : val.description,
        backgroundImage : val.backgroundImage
      }
      this.bookList.push( book )
      console.log('Your age is', val.title);
    });
  }

  viewDetails = function(bookId) {
    this.navCtrl.push(DetailsPage,  {
      bookId: bookId
    });
  };
}
One thing to note is that the storage.get is using promises to get data out of the storage module. Promises are asynchronous so things may not work as 100% expected. We’ll do a quick tutorial in our next lab!
Extending Ionic Storage
So Ionic storage is fairly limited. It only does key/value pairs so if you need a database that does relational data you’ll have to go with something else. That storage is SQLite and it works just like a normal database would. Unfortunately, you can’t run this plugin in the browser because it doesn’t have a proxy.
Next Time
That’s it! That is how you work with ONE plugin in Ionic. There are tons of other plugins out there and we don’t have time to go over all of them. But Ionic Storage is one that is highly likely you will use.
